how-to
Can Permanent Lights Damage Siding? What Homeowners Should Know
Editorial Team · Nov 18, 2026 · 12 min read
Last Updated: November 17, 2026
Quick Summary
Yes, can permanent lights damage siding, but the damage comes from how they are installed, not from the lights themselves. The two failure points are holes that let water in and heat that traps moisture out, so mount into structure, seal every penetration, and leave room for movement.
- Vinyl siding hangs like a raincoat, so a drill bit that punches into sheathing or house wrap opens a path for water.
- Fasteners should be snug, not cranked down tight, because vinyl expands and contracts with temperature.
- Exterior adhesives can leave residue when they fail under UV exposure and freeze-thaw cycles, and they trap moisture against the panel.
- Mounting tracks should attach to fascia or soffit structure, never to the thin vinyl panel face.
- Keep a log of install date, fastener type and spacing, sealant product, and photos of every penetration before and after sealing.
Table of Contents
- How Permanent Lights Can Damage Siding
- How to Install Permanent Lights on Vinyl Siding Without Damage
- Permanent Lighting Maintenance Tips That Protect Your Siding
- Permanent Outdoor Lighting Installation Cost and What Drives It
- Warranty and Long-Term Structural Impact of Adhesive vs. Mechanical Fasteners
- Climate-Specific Installation Advice for Cold Winters and Freeze-Thaw Cycles
- How to Safely Remove or Inspect Lights for Siding Damage
- See It On Your Home Before You Commit
- Frequently Asked Questions
How Permanent Lights Can Damage Siding
Yes, can permanent lights damage siding? They can, but the damage comes from how they are installed, not from the lights themselves. Small installation shortcuts can lead to big repair bills.
Siding is your home's first line of defense against rain, snow, and wind. Every hole, every patch of adhesive, and every tight clip changes how that defense works. Below, we break down the two main risk areas so you know exactly what to watch for.
Drilling, Fasteners, and Moisture Barrier Breaches
The biggest risk is a hole that goes too deep. Vinyl siding hangs on a house like a raincoat, not a sealed shell. It sheds water and lets air move behind it.
Water infiltration is the slow killer here. A single misplaced fastener can let in moisture that rots wood framing for years before you notice a stain on the ceiling.
Mechanical fasteners must also respect movement. Vinyl expands and contracts with temperature, so fasteners should be snug, not cranked down tight.
Adhesives, Heat, and Thermal Expansion
Adhesive mounting looks clean and hole-free, which is why it tempts so many homeowners. The problem is what happens over time.
Heat makes it worse. Vinyl softens in summer sun and moves with thermal expansion. An adhesive bond that grips a moving surface will eventually peel.
There is also a hidden trap: adhesive traps moisture against the panel. That trapped dampness can lead to mold and finish damage.
The article names two failure points behind siding damage from permanent lights, and each one has a distinct cause and fix.
| Problem | Cause | Fix |
|---|---|---|
| Water infiltration | Drill bit punches through siding into sheathing or house wrap | Seal every penetration with exterior-grade sealant |
| Hidden water damage | Oversized pilot holes and unsealed penetrations | Respect movement; keep fasteners snug, not cranked tight |
| Adhesive residue | Exterior adhesives fail under UV exposure and freeze-thaw cycles | Probe bond line; remove failing adhesive carefully |
| Finish damage | Adhesive bond peels off a moving vinyl surface | Mechanical fasteners, done right, let the panel breathe |
| Mold and finish damage | Adhesive traps moisture against the panel | Mount into structure and leave room for movement |
How to Install Permanent Lights on Vinyl Siding Without Damage
Safe installation follows three rules: mount into structure, never into the panel face, and leave room for movement. Learning how to install permanent lights on vinyl siding correctly means working with the siding's design, not against it.
Here is the order we recommend for a damage-free install:
- Plan the run first. Map the roofline, soffit, and fascia before touching a tool.
- Find the framing. Locate studs and rafters so fasteners bite into solid wood, not just vinyl.
- Prep the surface. Clean and dry the area so nothing traps dirt or moisture.
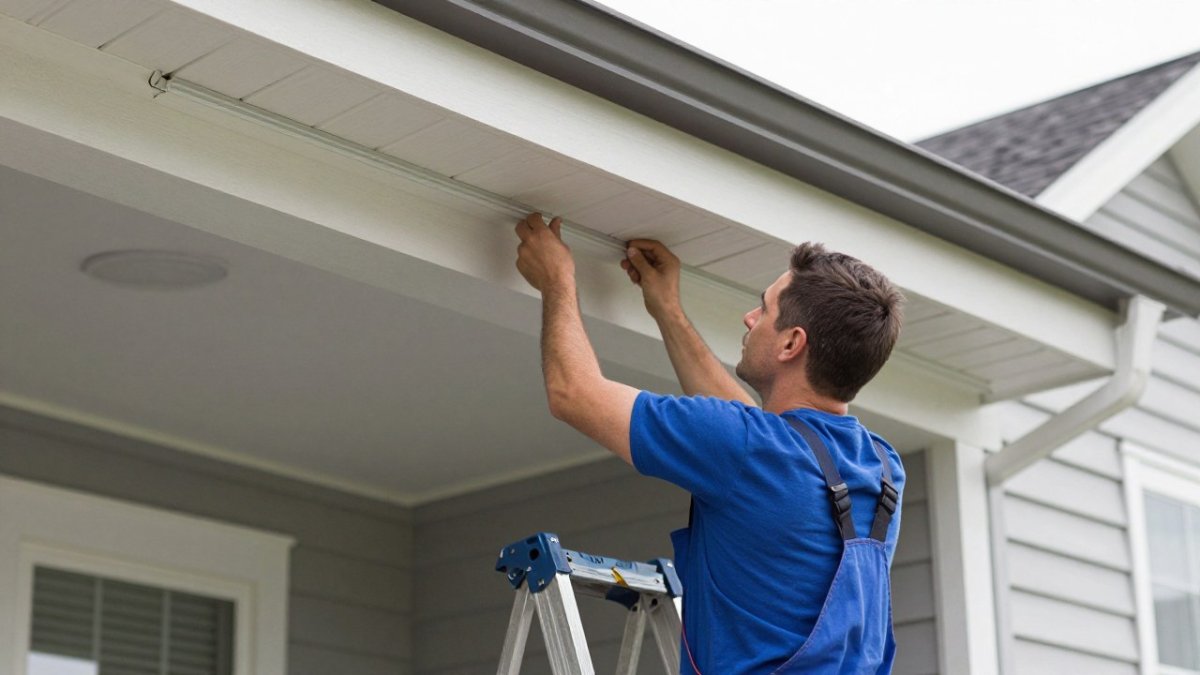
- Mount tracks to structure. Attach mounting tracks to the fascia or soffit where they belong.
- Leave expansion gaps. Give the siding room to move with the seasons.
- Seal every penetration. Use exterior-grade sealant on each hole.
- Test the lights before final trim. Confirm everything works before you close it up.
Mounting Tracks, Expansion Gaps, and Surface Preparation
Mounting tracks are the backbone of a clean, safe install. The track carries the light, and the track attaches to structure, not to the thin vinyl face. That single choice protects the panel from stress.
Expansion gaps matter more than most people realize. If you want to see how puck lighting hardware mounts under soffits and eaves, you can compare puck and strip lighting options before you commit to a design. If a continuous line suits your architecture better, see how LED strip lighting runs in a concealed track.
Permanent Lighting Maintenance Tips That Protect Your Siding
Maintenance is where the adhesive-versus-fastener debate actually plays out. A mechanical install needs periodic torque checks; an adhesive install needs residue management.
Seasonal Inspection by Mounting Method
For mechanical fasteners:
- Check that fasteners are snug but not over-driven; a crushed vinyl panel around a screw head is a stress crack waiting to happen.
- Look for rust or corrosion on screws and clips, especially on coastal or high-humidity properties, and replace with exterior-grade stainless or coated hardware.
- Confirm the track still floats in its slotted holes rather than being pinned rigidly.
For adhesive mounts:
- Probe the bond line at the top and bottom edges; lifting at either end means the bond is failing and moisture is already behind it.
- Remove failing adhesive carefully, using methods approved for the siding finish.
- Expect residue: most exterior adhesives leave a gummy film that attracts dirt and can stain light-colored siding if left through a summer.
Cleaning Without Forcing Water Behind the Siding
Power washing at high pressure can cause self-inflicted damage. It forces water past the panel lap and strips finish. Use a soft brush, mild soap, and a gentle rinse, and direct water downward along the lap, never upward into the joint.
Warranty-Safe Record Keeping
Siding manufacturers set fastening and penetration rules, and a claim can be denied if the installation does not match them. Keep a simple log: date of install, fastener type and spacing, sealant product used, and photos of every penetration before and after sealing.
Watch out: a sagging track or a rust streak below a fastener usually means water has been entering for at least one season, so treat either as an inspection trigger rather than a cosmetic issue. If you want to understand how a professionally installed system is controlled and maintained all year, see how permanent architectural lighting works.
Permanent Outdoor Lighting Installation Cost and What Drives It
Permanent outdoor lighting installation cost depends on more than the lights. The price reflects the size of your roofline, the number of stories, the mounting method, and how much prep the siding needs.
Several factors move the number up or down:
- Linear feet of roofline and number of runs
- Single-story versus multi-story access and ladder work
- Puck versus strip hardware and the track system
- Condition of the fascia, soffit, and existing siding
- Whether old fixtures or adhesives need removal first
Pricing depends on the size of the roofline, the mounting method, and the prep the siding needs, so we recommend requesting a quote for current pricing. When you are ready, you can request a free estimate with your property details.
Warranty and Long-Term Structural Impact of Adhesive vs. Mechanical Fasteners
Warranty coverage is the angle most guides skip. Siding manufacturers set rules for how their product is fastened and penetrated.
That is a real cost, not a technicality. A voided warranty can leave you paying for panel replacement out of pocket.
Mechanical fasteners and adhesive also differ in long-term structural impact. Fasteners, correctly placed into framing, hold steady and let the panel move.
Mechanical fasteners into structure, sealed penetrations, and a record of the install are sound practices for protecting siding warranty coverage.
Climate-Specific Installation Advice for Cold Winters and Freeze-Thaw Cycles
Vinyl siding expands and contracts noticeably with temperature changes. That movement is normal. The damage comes when the light track or fastener prevents it.
How Thermal Expansion and Contraction Actually Work on Siding
Vinyl panels are typically installed with room to move, so they can expand and contract. A permanent light track bolted rigidly across several panels locks that movement at each fastener. When the panel tries to contract in cold, the stress concentrates at the nearest hole and shows up as a star crack or an elongated slot. In heat, the same panel buckles between fixed points.
Cold-Weather Installation Rules
- Check the siding manufacturer's installation instructions for minimum application temperatures, as vinyl panels can be brittle in cold weather.
- Use a sealant rated for low-temperature application and joint movement.
- Leave expansion gaps at least as generous as the siding manufacturer specifies, and never bridge two panels with a single rigid track section.
- Fasten through slotted holes where the siding provides them, and keep fasteners centered in the slot so the panel can move in both directions.
- After the first freeze-thaw season, re-check fastener torque and sealant adhesion; this is when loose connections first appear.
Water that enters a gap and freezes can widen it over time, so sealing penetrations before cold weather is important.
Heat, UV, and Summer Movement
Summer is the other half of the cycle. Vinyl softens and sags between fasteners when surface temperatures climb, and adhesives lose grip faster under UV exposure. A track installed tight in July will be under tension by January. The fix is the same in both seasons: mount to structure, allow movement, and seal every penetration with a flexible exterior sealant. If you want to see how a track system is designed to accommodate this movement, see how permanent architectural lighting works.
How to Safely Remove or Inspect Lights for Siding Damage
Removal is where hidden damage shows up. If you ever need to move or replace a system, do it carefully and inspect as you go.
Use this inspection checklist:
- Photograph the roofline before you start
- Remove fasteners gently; never pry against the panel
- Check each hole for soft wood or water stains
- Look for adhesive residue and finish damage
- Probe the moisture barrier around each penetration
- Re-seal or patch any opening you leave behind
- Note any cracks, corrosion, or loose panels
Signs of improper installation include sagging track, rust streaks, cracked panels near mounts, and sealant that has pulled away. If you spot these, get them fixed before the next storm season.
See It On Your Home Before You Commit
The best way to avoid siding damage is to plan the design before anyone climbs a ladder. Curb Appeal Permanent Lights offers an online photo visualizer so you can preview lighting on your own home. You can see it on your home before you commit.
The real risk with permanent lights is not the lights. It is an install that ignores how siding moves, breathes, and sheds water. Get the mounting, sealing, and expansion details right, and your siding stays intact for decades.
Frequently Asked Questions
Can permanent lights damage siding?
Yes, if installed poorly. The main risks are drilled holes that breach the moisture barrier, adhesive residue that traps water, and fasteners driven too tight and cracking vinyl. When permanent lights siding is mounted with proper mechanical fasteners, expansion gaps, and sealed penetrations, the siding stays intact. The damage comes from installation method, not the lights themselves.
Does the adhesive used for permanent lights ruin siding?
Adhesive can leave residue that is difficult to remove and can trap moisture against the exterior cladding. On vinyl siding, adhesive also fights thermal expansion, which can pull panels loose or leave a sticky film that collects dirt. Mechanical fasteners with a mounting track are the safer choice for vinyl because they allow the siding to move as temperatures change.
What should you not clean vinyl siding with around permanent lights?
Avoid bleach-heavy solutions and high-pressure power washing near fixtures and seams. Bleach exposure can dull vinyl and degrade weatherproofing, while a narrow power-washing jet can force water behind panels and into light tracks. Use a soft brush, mild soap, and low pressure, and rinse downward so water sheds away from the roofline.
How do professional installers prevent siding damage?
Professional mounting starts with locating the moisture barrier and avoiding it. Installers use mounting tracks anchored into framing rather than the panel face, leave expansion gaps at the ends of tracks, seal every penetration, and route wiring under the fascia or soffit.
